You may recall that my friend Julie was pregnant in the fall. Here’s a post with her, her husband Guy and their precious “bump” at the art gallery, and here’s one when she only had a few weeks left before welcoming their son.
Well, James is here now, and he’s wonderful. I’ve had the pleasure of spending quite a lot of one-on-one time with this wee fellow so far, as I have babysat him at our place three times since he was born. Not having had much opportunity to be with young babies very often in my life, these have certainly been memorable and treasured hours.
Such a nice experience occurred the fourth time we met, when he was merely 13 weeks old, while his mother was dropping him off. They’d just arrived and following the flurry of getting him out of his carrier and removing his cold-weather outerwear, he was sitting on his mom’s lap, while she was having a little chat with Nick. Unbeknownst to the two of them, James and I made eye contact and I was gifted with the most charming series of baby smiles ever. My heart might have melted on the spot. I know everyone thinks “their” baby is the cutest, and I am joining those ranks.
Here are some pictures I took of him when he was 11 weeks old, to back-up my opinion …


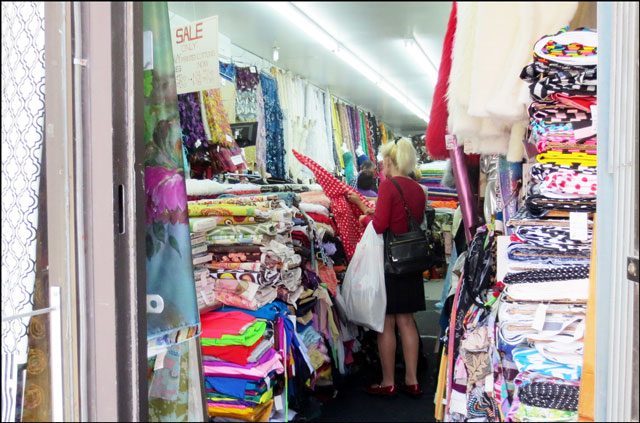
And here’s the blanket I made him. I used a piece of never-washed vintage printed flannelette that I had in my stash, combined with some brand new fabric in a solid navy blue (that I found at my fave fabric shop on Queen Street West, Affordable Textiles) and some quilt-batting that I’d gotten at Fabricland a while ago.


↑ Nick ↑
Everything is 100 percent cotton, including the thread, so it should wash up beautifully, with all the elements shrinking together. This should give it that attractive, slightly puckered look, inherent to vintage quilts.

To make it, I sandwiched the batting between the printed and plain fabrics, leaving a few inches of extra batting and the plain, around the print (which was the piece that would be determining the finished size of the blanket — I had just that one single 36″ square of that).

Then, I hand-stitched around every third motif on print, anchoring all three layers together. I could have used my sewing machine to do that, but I prefer the look of hand-stitching for this kind of thing. (Yes, this took a while to do, but it was a labour of love!)
It’s hard to see the stitching from the front, so I’ve included a couple of shot of the back …


It’s easier to leave that extra batting and backing fabric around the edges and then trim them after you’ve done your stitching, because you don’t have to worry about things shifting around a bit as you’re working.

↑ trimmed edges before binding ↑
To finish the blanket, I used the machine binding technique learned in a Youtube video by the Missouri Star Quilt Company. Note that in the video, she doesn’t clearly explain how to begin and finish the binding, so I referred to this tutorial for that part, specifically the “Tucked Method”.
Now, I won’t lie and say the edging turned out perfectly, because this technique is meant to be used on thinner cotton fabric, as opposed to the thick flannelette I was using. In my case, there was no way my sewing-machine was going to be able to tackle the thick corners, so I sewed towards, and from, the corners as closely as I could get, and went back and finished the corners by hand.
They look fine and you probably wouldn’t know there was an issue with them if I didn’t mention it, however, in case you try to make one of these yourself, I thought I’d mention it. Here’s a close up shot of how they turned out …

To go with the blanket, and co-incidentally matching in colours, I had these over-alls for James too. Considering the store I got them at, Eaton’s, has been closed since 1999, these are at least 17 years old, making them almost vintage. I’ve held onto these since buying them for a baby shower. Back then, it wasn’t as common for people to find out the gender of their baby, so we didn’t know if she was having a boy or a girl. I thought this outfit would suit either, but was convinced otherwise by a friend, who upon seeing them said, “I sure hope she’s having a boy”. Anyway, the baby was a girl, so I ended up getting her something else and keeping these. They were put away and I found them recently, just in time to give them to James.


In keeping with my love of vintage, I made the card with some old gift wrapping paper, using the technique demonstrated in this post. The scalloped card base is something I found at Micheal’s.


I’m excited to be going out with James and his lovely mom tomorrow. It’s been a few weeks since I’ve seen him and I can’t wait. I very much look forward to the adorable baby smiles that will surely be coming my way.

Thank you very much for checking out my post. I hope you’re having a great week.