How to Make a Fabric Pumpkin with Old Cotton Flannel
↑ Update Autumn 2020 : Now With a Video Tutorial! ↑
(Aside: If you liked the video, it would be helpful to me if you’d go over to YouTube by clicking here, and give it a thumbs up and/or leave a comment. Also, it would be great if you’d subscribe to my new YouTube channel. No pressure, though. Thank you, if you do!)
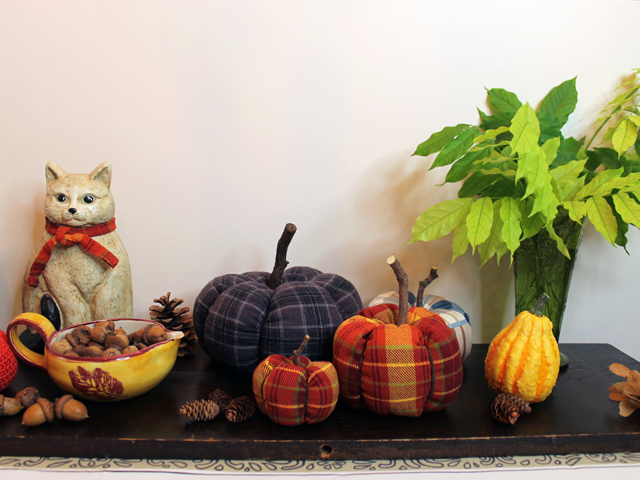
To see photos of the new fabric pumpkins I made, and how I styled them this year, please see this post.
On with the originally posted written instructions …

Is there a pair of cozy flannel pyjamas, nightgown or shirt in your home, that’s ready to hit the ragbag? If you’re having trouble getting rid of the item due to sentimental attachment — your child outgrew last year’s holiday pjs, you remember wearing the shirt while visiting a friend who lives too far away, your beloved Aunt gave you that nightgown — than, all the better. Here’s an idea that will : (1) give you a way to hold onto fond memories, (2) make a charming seasonal decoration for your home, and (3) provide the fun of easy-to-do hand-crafting, all rolled into one!

To make our Poofy PJ Pumpkin, I used an old pair of my husband Nick’s pyjama pants, that I’d bought him years ago so he’d have something fresh to wear when he traveled to the west-coast to visit his parents. His dad was so taken by Nick’s natty nightwear, that he requested a pair of his own. So, I went out and found a second pair to mail to my dear father-in-law.
Since this technique calls for a section (a tube) cut from the sleeve or leg, the size of the original garment will determine the size of your finished pumpkin. You can make several from one pair of pyjamas, if you want.

What you need to make one yourself :

– A piece of worn flannel, specifically a section of a sleeve or leg. If you don’t have that, than a rectangle of fabric that’s about twice as wide as it is tall, will also work, however it will involve the extra step of shaping the piece into a tube first. New fabric can be used but it should be washed until it’s nice and soft. In other words, stiff fabric does not give you the best results.
– Some fiber-fill or a bag of cotton balls, depending on the size of your flannel.
– Some regular thread in a colour that matches the flannel, and a sewing needle.
– Some yarn or embroidery floss that matches the flannel, and a yarn/tapestry needle. (A yarn/tapestry needle is a larger needle than a regular sewing needle which would be too short for this purpose.). A pair of pliers might be helpful for pulling the tapestry needle through, if needed.
– A section of thin branch or a cinnamon stick.
How to make it :

↑ (1) Cut your fabric tube, from either the sleeve or leg, that’s about an inch longer than it is wide. Don’t include any hem part from the original garment, so cut that part off first. It doesn’t matter if the tube is tapered. Iron the fabric if it’s overly wrinkled.
(2) Thread your sewing needle with TWO pieces of thread that are at least twice as long as the width or your fabric tube, plus an inch or two. (you want a strong double thread so it doesn’t break when you pull on it later).

↑ (3) Turn your fabric tube inside out and do a running stitch about 1/2 an inch from the bottom edge. If your tube is tapered, choose the wider end to work on first. It will become the bottom of your pumpkin. Make sure the end of the thread doesn’t get pulled along, through the fabric, as you’ll be using the tail to tie a knot in the next step.


↑ (4) Pull to gather the fabric, and close the end as tightly as you can. Cut off your needle and tie a good knot using both ends of the thread.

↑ (5) Turn right-side out.

↑ (6) Do the same along the top edge of the tube, but don’t pull tight yet.

↑ (7) Stuff the tube with fiberfill or cotton balls.

↑ Image demonstrates that the stick will go through there, but pull it out before pulling the threads and gathering tightly.

↑ (8) pull tight, to form a poofy ball, making sure that the top gathering hole will be big enough to accommodate your branch or cinnamon stick. Push the ends of the thread down through the gathering hole.

(9) Measure your ball from bottom gathering to top gathering — mine was 11 inches. Cut a piece of yarn that is double that measurement plus an inch or two. Thread onto tapestry needle, pulling until the needle ends up in the centre of the piece, so the yarn is folded in half and therefore doubled in thickness.

↑ (10) From the top gathering, push the needle right through the ball, coming out through the bottom gathering. Cut the end to free your needle. Pull the yarn (double thickness) tight to form a “rib” in your pumpkin, and then tie the two ends of yarn together with a good (triple) knot. If you have trouble getting the needle through, a pair of pliers is helpful to help pull it.

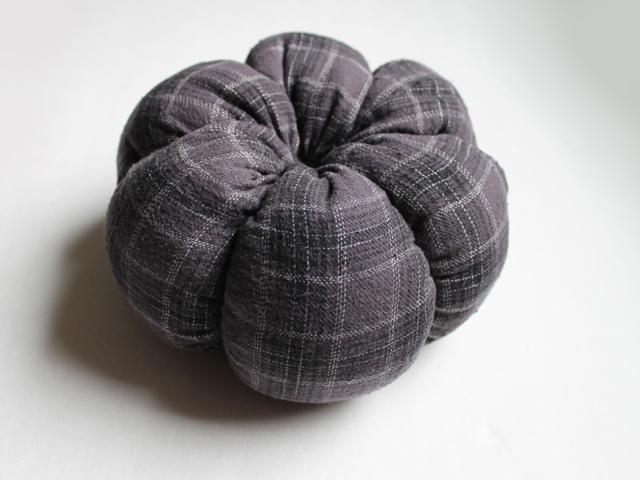
(11) Repeat to create as many ribs as you’d like (I made six in mine).

↑ (12) Pull the yarn to turn the knots to the inside of the pumpkin, by going through the top gathering hole, and therefore pulling the raw edges of the top gathering down into the pumpkin. Repeat with all ribs.

↑ (13) Cut your branch to a length equaling the height of your pumpkin, plus a few inches, so it will look like the stem of your pumpkin. Pass the branch piece or cinnamon stick throught the top gathering hole (that you previously left big enough to accommodate it).

Note, I found a stick that I preferred after I took the photos above, so switched it out for the photos of the finished creation.


↑ This cutie was very curious to know what I was doing out there, and if, maybe I had some peanuts. ↑

And there you have it!
I love my poofy flannel pumpkin, and hope you’ll feel the same way about the one(s) you make!
Wishing you a great weekend,
xo loulou