How to Make a Heart-Shaped Decoration for your Wall

With Valentine’s Day around the corner, perhaps you have an urge for a heart-shaped decoration to hang on your wall. Using a pre-cut piece of wood as a base and some quick drying acrylic craft paint, you can have this finished in under an hour. It’s an easy little craft resulting in something that you’ll be able to reuse year after year.
What you need :

– A wooden heart-shape. I found mine, which is 9x 9 inches in the wood section at Micheal’s Craft Store, where it was $1.69. (I go to the one at John and Richmond)
– Some acrylic craft paint in the colour of your choice. Having a thing for a red and black Valentine colour pallete, I used “Dark Red” which I got at Dollarama.
– A foam paint “brush”, also found at Dollarama in packages of 6.
– A couple of pieces of thick printed paper and/or card-stock. My polka-dot paper is thick gift wrap and the other one is from a pad of printed card-stock paper meant for scrap-booking.
– Something to stick the papers down with. I found that one of those two-sided glue-tape things (again, Dollarama) worked surprisingly well, but regular two-sided tape would be fine. I find glue to be messy so don’t use it much, but glue would probably work for this, too.
– A scrap piece of paper, a pencil or pen, and a pair of scissors.
– Some duct-tape or fabric tape and a small nail to make the hanging thing on the back.
How to make it :
1) Trace the wooden heart on the scrap paper to make a pattern. You’ll use this to make a pattern for your paper hearts, because not all hearts are shaped the same and this will ensure that that you’ll get a nice, equally spaced border all around the paper hearts.
2) Paint the wooden heart. I found two-layers did the job nicely. I gave the back a quick layer too, but as long as you paint the sides, the back isn’t necessary, as you won’t see it when it’s hanging on the wall.


3) While the paint is drying you’ll make your paper hearts. Cut out the paper heart you traced and fold it in half lengthwise. You’re going to trim this pattern down to use as a pattern to make the larger paper heart first, so copy the shape of the heart, making sure it’s the same distance from the edge all the way down. Keeping it folded, cut the edge off and open it up. You’ll now have a pattern for a heart that is smaller, but the same shape as the base.


4) Trace your pattern into the paper you want for the larger of the paper hearts, and cut it out.

5) Stick it to the wood by running the two-sided tape all around the edge, getting as close to the edge as you can. Centre it on the wooden heart and stick it down.

6) Now you’ll use the same pattern piece to make the smaller heart. Refold it and draw a border that’s the same distance from the edge all the way down. Note that making this border a little more narrow than you did the first time will result in a layered look that will look nicer than if you make it the exact same width.
7) Trace the smaller heart on your paper or card-stock and cut it out.
8) Stick that heart into the centre, the same way you stuck in the first one.

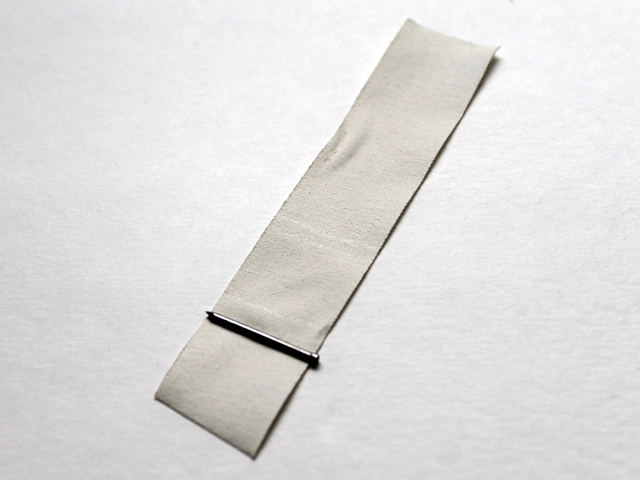
To add a hanger thing on the back, you can just use those pre-made adhesive picture hangers (like these found on Amazon), however I’ve found a quick way to make them, which I’ve used to hang other light things.
NOTE : Please use this technique for only light-weight, less-valuable, items. I’d hate for anyone’s cherished ceramic plate to smash as a result of using this method to hang it on the wall.
To make one, take a longish piece of tape and enclose the nail by folding about an inch and a half over it, as shown in the photo. This reinforces the tape, but since this project is so light, you can probably skip the nail, and just fold the tape over. Then stick the tape, lengthwise, to the back of your piece, so the fold in the tape is very slightly below the top of the piece (you don’t want the tape to show from the front, but you also don’t want the tape to be too low, as the higher it is the more stable the hanger will be. Then add one or two pieces of tape across the first piece, about and inch and a half from the fold. You’ll end up with a tab, which you can then make a hole in. You can use that hole to hang the item directly on a nail in the wall, or pass a string or thread through and use that as a hanger (which is what I did.)

↑ I just gave the back a quick thin layer of paint, which I why it looks streaky. ↑

Then just hang it up and admire your handiwork!


I hope these instructions are clear and that you consider making one of these yourself.

Thanks very much for reading,
xo loulou
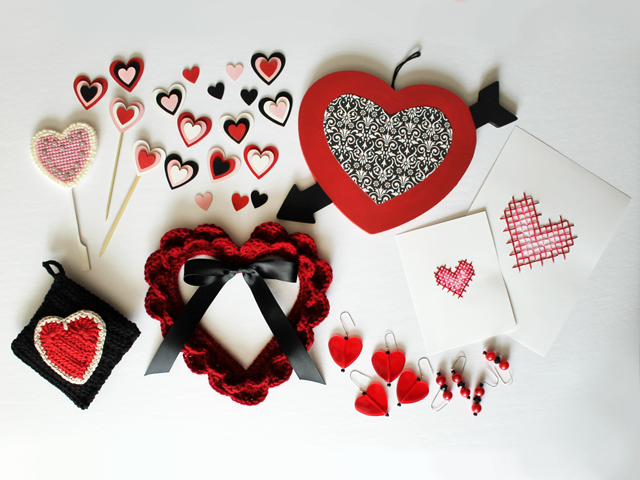
Follow Up February 2020 : I made another one! Pictured below, it’s similar to this but uses a die-cut of a heart with an arrow going through it. You can see it here, displayed among a variety of other handmade Valentine decor.
These stories were linked to.
Related Subjects
holidays-valentines-daymaking-things A Handmade Valentine Card : Red, Black and the Printed Word
 Handmade Hanging Heart Valentine Decorations
 Vintage Barbie Dolls Get Dressed Up for Valentine’s Day
 Week 6 Creative Challenge : Handmade Valentine Decorations – Cro...
 Week 5 Creative Challenge : Four Themed Vintage Valentine Vignettes fo...