Hi! I hope you’re doing well. Here’s my weekly post about what I made last week for the Creative Challenge I’m doing for 2023.
I’ve mentioned recently that I love seeing what all the miniature enthusiasts are doing on Instagram. The little dioramas these talented creators set up are so very charming. I can’t help but be inspired to try my hand at the world of tiny things. I began a couple of week ago by making a small Hudson’s Bay Blanket.
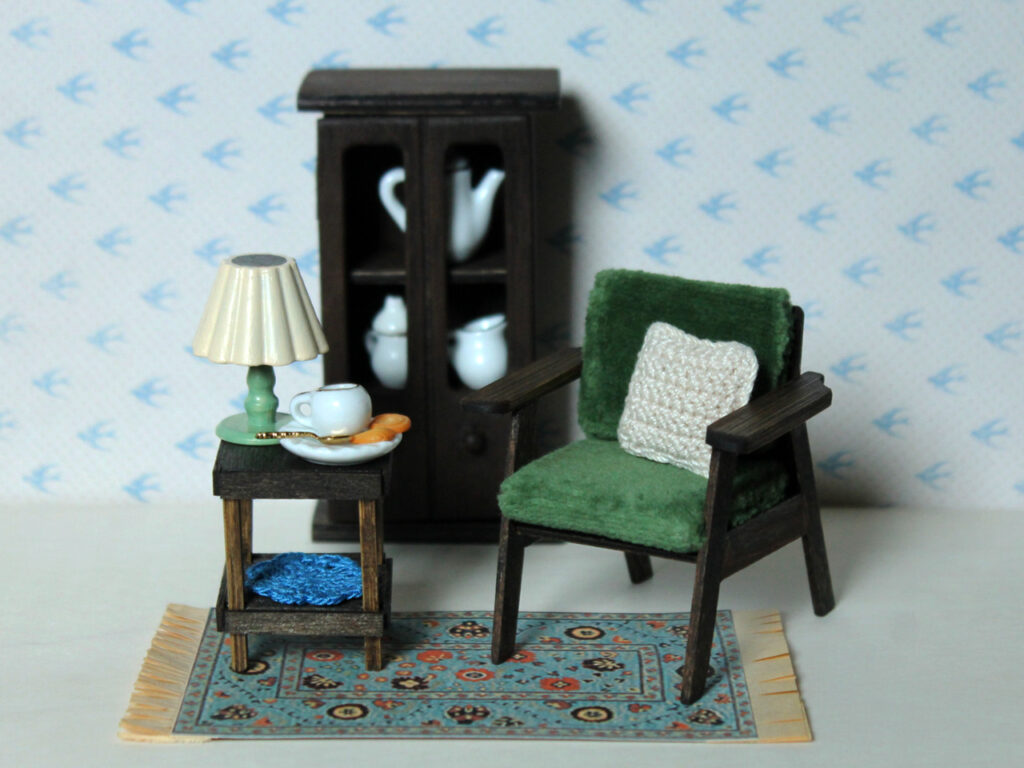
And, this past week, I redid a plain wooden cabinet that I found in the children’s crafting section of Dollarama. It came with 3 small pots of acrylic paint in primary colours and a little plastic paint brush, so, kids were meant to paint it.

I liked its 60s teak looking rounded door windows and wooden knobs, but the edges were wonky, the shelves inside were crooked and, most importantly, the door was glued shut. I thought the piece was crying out for a furniture restoration.
The first step was to take it apart. Not going to lie, I thought that would be a lot easier than it was. The glue that had been used has super holding power, for sure. I ended up using an old blow dryer on high heat which softened the glue a bit and then, using a chisel and utility knife I found in Nick’s toolbox, I carefully got it apart. I left the sides attached to the back, though, because I didn’t feel they needed to be separated.

Then I sanded all the pieces with fine grit paper. The reason the two shelves were crooked is that they were slightly too big for the width of the cabinet, so there was no way they could have been put in straight. I sanded the shelves down so they fit correctly.

The next step was to apply a layer of Minwax stain with a foam brush. This was left to dry for 24 hours. After it was stained I noticed that the glue that had previously been used had been sloppily applied, so the stain didn’t penetrate evenly in some places. I hadn’t thought to sand down the whole thing to remove all the glue before staining because the glue was completely invisible, so I didn’t know it was there. In hindsight, I should have just sanded the whole thing. Anyway, I fixed the spots that hadn’t taken the stain well by dabbing them with a tissue with a small amount of brown acrylic paint on it. It totally did the trick.
Then I glued in the shelves and the top and the bottom to the body of cabinet. I made a couple of hinges for the door with some small scraps of leather which I glued to the inside edge of the door, and then, after letting that set, to the outside of the cabinet. That worked well but the door didn’t stay shut. I thought about adding a hook of some sort, but then decided to just glue a strip of leather along the bottom of the door, which gave the door enough friction to stay shut on its own. Problem solved!


While I had refinished the little top decorative piece, I ended up leaving it off, thinking that the cabinet looked better without it. And, now something can be put on top of it, like a little tiny basket. The wheels are turning!
I was glad to find this cute Calico Critter bunny in one of those mixed bags from the thrift store in the spring. She helped me decide if the miniature cabinet had successfully been refurbished.


↑ There’s extra storage on the bottom shelf. I made the plate stand with a bit of wire. ↑
↑ That’s the same photo the post began with but it didn’t feel finished without a final look ↑
I think she likes it. I hope you do, too! xo loulou