Handmade Valentine Decorations : Plastic Canvas Needlepoint Hearts

Hello! Here’s a fun-to-do DIY that anyone with an urge to make something with yarn can enjoy. The craft is “needlepoint” but, rather than being done on a finely woven mesh with thin wool, as it usually is, these are made with heart-shaped pieces of plastic canvas and thick yarn, so they’re easy, quick and suitable for new stitchers and experienced ones alike.
With it being Valentine’s Day, the hearts are timely, however, these shapes are available all year around, at Michaels (in packs of ten for $1.49) and probably other large craft supply shops. While I’ve made mine to use as Valentine decor, done in other colours, they could just as easily suit a baby-shower, birthday party or Mother’s Day. Even in the Valentine colours, I plan to pull these out again at our anniversary, as I do with the other Vday things we have. Hearts are my favourite shape, so the more the better!
Under the package label on the plastic canvas, you’ll find general instructions for how to needlepoint (it’s simple!), but they don’t come with information on how to best fill the hearts in. The key thing, in my opinion, is to completely and totally hide all traces of the plastic base, because plastic and woolly handmade just don’t go well together.
After finishing six of them last weekend, I believe I’ve figured out a good plastic-covering strategy. I worked on them last weekend, while wicked winter weather was swirling around outside. I’d actually not originally intended to make so many, but they’re rather addictive, so I just kept pulling out another one, to begin again, while drinking tea and watching movies. At one point, I experienced such a calm feeling of warmth and comfort, stitching away while hearing the sound of ice pellets tapping against the window.
Each heart takes about 45 minutes to stitch, and then more time, depending on the further embellishments you choose to add.
If you’re looking to make this a real quick craft, the fastest way to finish them would be to create a simple loop for hanging from a piece of yarn or ribbon and gluing a piece of felt on the back (which you could even skip if the heart was going to hang against a wall, but note that the back side of them does not look very nice, no matter how careful you are with your stitching. That can be viewed as a good thing, in that it makes no difference what the back looks like so you can just forget about it and more fully enjoy the act of creating something.
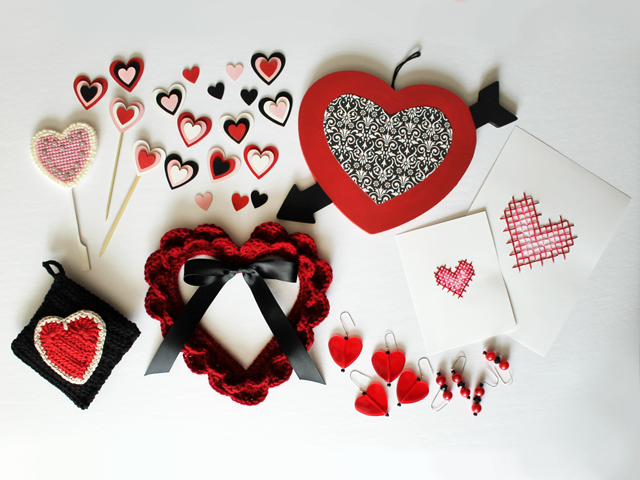
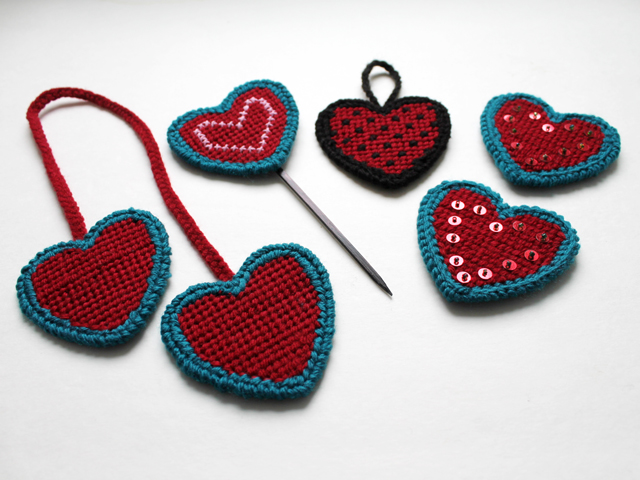
Before we get to the instructions, here are some pictures of other ways to finish your needlepoint hearts …


How to do it!
- Supplies :
- Heart Shaped pieces of plastic canvas.
- A darning needle.
- A needle threader – optional but very handy. (I found mine in the needle-point section of Michaels)
- About 104 inches each of two colours of yarn. Choose something on the thicker side for better coverage, or use a double thickness of a thinner yarn.
- Felt
- Paper to make a pattern for the felt backing.
- Optional embellishments such as sequins, beads, embroidery floss, a bamboo skewer.


↑ I think that little tab is there so you’ll know which side is the front but I found that it made no difference which side you used as the front. The tab should be clipped off before you begin. ↑

Tips :
- Use a couple of shorter pieces of yarn rather than one long piece. This will save a lot of headache. I found that two pieces of each colour, each about 52 inches long were enough. So, four pieces, each being about 52 inches long.
- Don’t worry about making knots at the beginning or end of the yarn. Rather, just pass the tails underneath the other stitches.
- While you’re stitching, from time to time, hold the piece up and let the needle and yarn hang, so that it spins around freely. For some reason, the yarn twists while you work, which makes the yarn appear thinner and therefore not covering the plastic as well, so this is to untwist it.
- If you look closely at the plastic canvas shape, you’ll see some tiny “incomplete” holes. The plastic has some stretch to it, so you can use those holes, but you will have to push your needle through and pull on the yarn to get it through. I did use them, again, for better coverage, however, if you’d like to skip them you can. See how you feel when you get to them.
Filling in the Hearts :
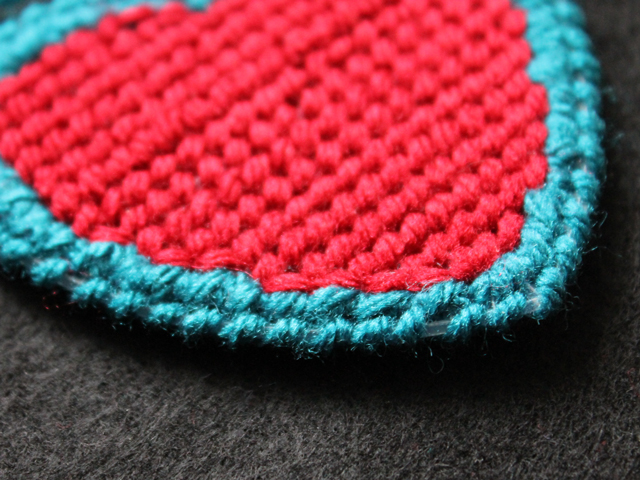
You can certainly do the middle part first and then finish with the border, but I found that it’s easiest to first do the border around the middle part of the heart, with your contrasting colour of yarn. This is so you can see what you’re doing better without the middle part stitching obstructing the view. Once you have that border done, you then go ahead and fill in the middle with straight-forward stitches.
A border of two rounds of stitches will better cover all the plastic. The first time, you go around stitching through adjacent holes and the second time you go around making your stitches at an angle, so the plastic between in covered. (The pictures explain this more clearly than words can.)

↑ The border after one row done. Note how you can still see a lot of plastic between the stitches, which is why you’ll want to go around with a second row. ↑

↑ Much better coverage. ↑
The middle part is traditional needlepoint, where stitches go at an angle — imagine a square of holes, you go from one corner diagonally to the other corner ie: from the bottom left corner to the top right corner of the square.
In some spots, such as the bottom left angle of the heart, you’ll have to step away from the “normal” stitch, because there will be gaps. In those spots, you make single stitches that go the opposite way ie: from the top left corner to the bottom right corner. Again, the pictures will help explain it.

↑ See the gap? ↑

↑ The gap is filled in with a stitch that goes in the opposite direction than the others. ↑

↑ Fill in the middle by going across and back again, and then each top part separately. ↑
Once your middle part is completely filled in, you can finish with two rows around the very outside part, again, with the first row having stitches that go across and the second row having stitches that go on the diagonal.
↑ Outer border after one row of stitches. You can still see quite a bit of plastic. ↑

↑ Completed with a second row of stitches, going in the diagonal, around the outer border. ↑
Now, you decide if you’d like to embellish your hearts with sequins or a cross-stitched inner heart with embroidery thread and do that part next.
Adding Sequins :


↑ 12 sequins per heart works out nicely. Begin with a knotted piece of regular thread on a thin sewing needle. Attach them by passing the thread through the heart, through a sequin, through a seed bead (which will anchor the sequin), and then back through the sequin and heart. Without tying a know, move to your next one. Finish with a knot. ↑
Adding embroidered cross-stitches :
If you’d like to embroider an inner heart with embroidery floss, use three strands (it comes in six strand thicknesses, so divide) and make cross-stitches right over the yarn, following the pattern in the photo.

If you’d like to make a pick that can be put into a vase or stuck into a plant, a regular bamboo skewer does the trick. I “painted” mine black with a Sharpie marker. Stitch the skewer to the back of the heart.
Adding a stick to make a pick :


Adding a Loop :
Or, you might want to add a loop for hanging, from yarn or ribbon. For the black and red one, I made a chain in the yarn with my fingers (as described in this image) but if you have a crochet hook, you can use that. Attach the loop to the heart.

↑ I didn’t take photos while I made this black and red one, because I was winging it. If you’d like to try it, the black dots are cross-stitches, which I did directly onto the plastic canvases with black yarn (the yarn I had was thinner, so I used double thickness). Then, I filled in the red part with the same needle-point stitch as before, going around the black dots. ↑
The final way I finished a couple of the hearts was to attach them together with a braided length of yarn (I used double thickness, so six strands divided into three and braided like a regular three-strand braid.)

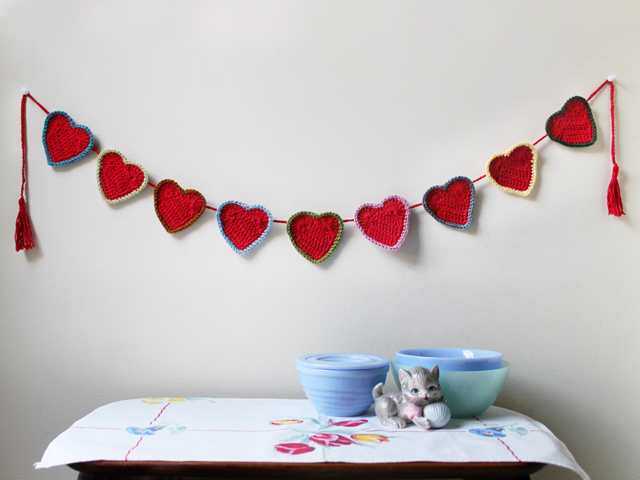
Another thing that could be done with these is to string them into a garland. Since they come in packages of 10, you’d have enough to make a nice long one. I didn’t do that because I already have a heart garland, which is crocheted. You can see the DIY for that one here, if you’d like.
To make the felt backing, cut out a pattern from paper, by tracing around a plastic canvas heart (before any stitching is done) and cutting that out. Since the felt piece should be smaller than the heart, so it won’t be visible from the front, make the heart a little bit smaller by folding the paper in half and trimming off about 1/4 inch. Pin the pattern to the felt and cut around it to make the backing for one heart.

The felt piece can be glued to the back with fabric glue, but I chose to stitch mine on, using a basic whip stitch.


I’ll finish with a few more pictures of how these hearts are currently being displayed in our home …

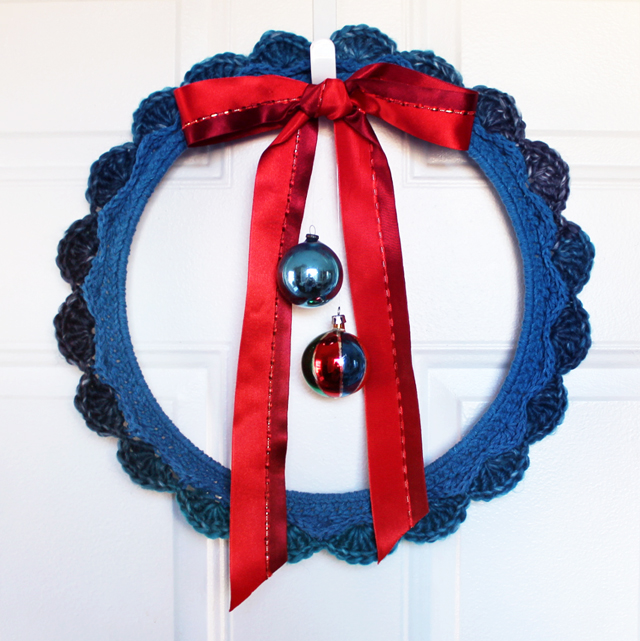
↑ You might remember this wreath that I crocheted at Christmastime. Now it’s being used as a Valentine decoration. ↑


Thank you for reading. I hope I’ve inspired you to do some stitching!
Wishing you a Happy Valentine’s Day, if you celebrate. As for us, we enjoy the reason to have a little two person party!
Loulou xo
Follow Up 2020 : I made another one of these, using soft pink and creamy white yarn, which turned out to be quite pretty. You can see it here!