


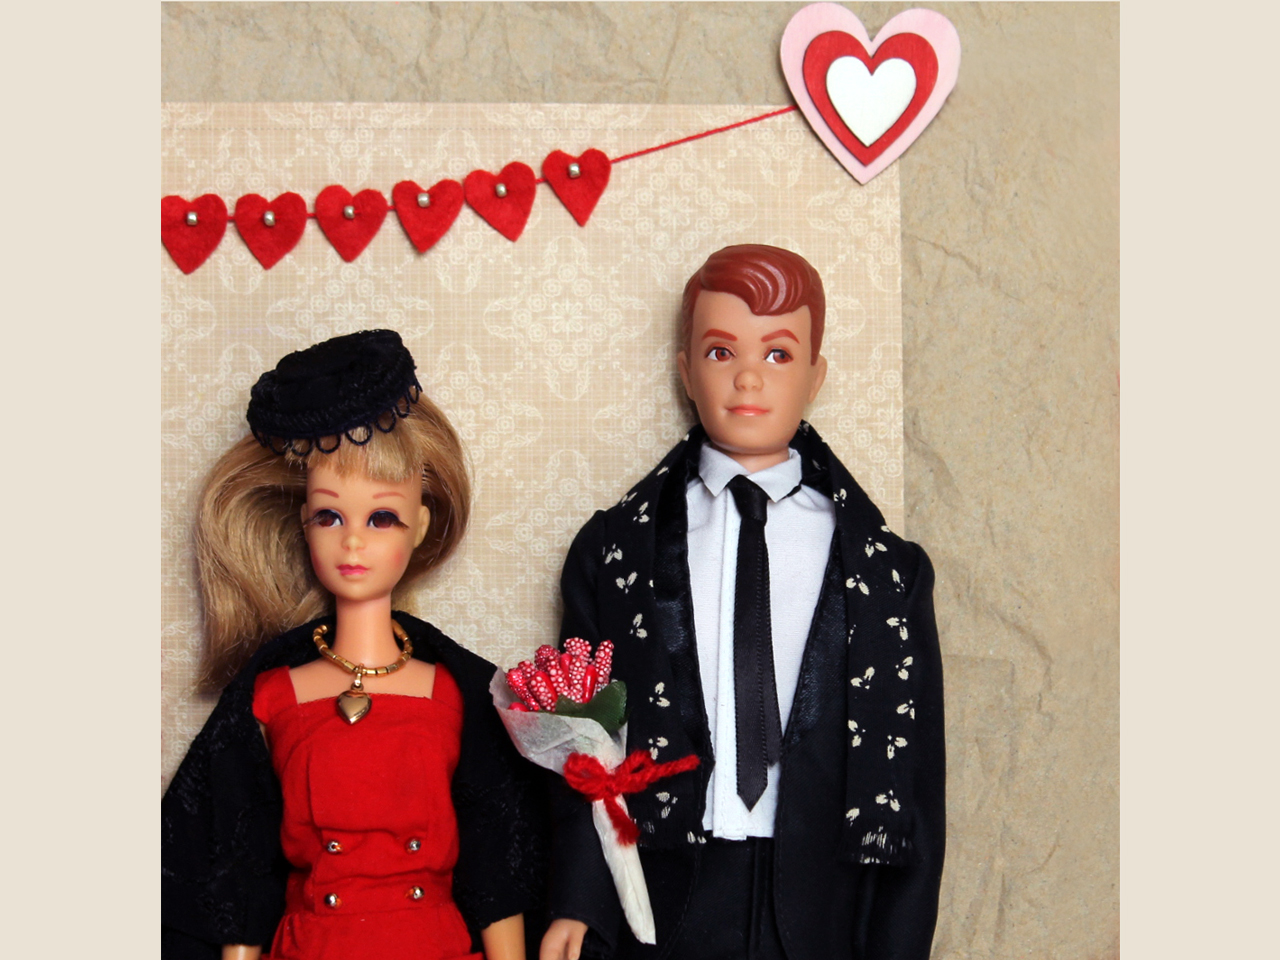
Vintage Barbie Dolls Get Dressed Up for Valentine’s Day

Hello! If you celebrated Valentine's Day yesterday, I hope you had a good time.
The Barbie doll gang had fun getting all dressed up and going to a special concert, performed by their friend Barbie herself.
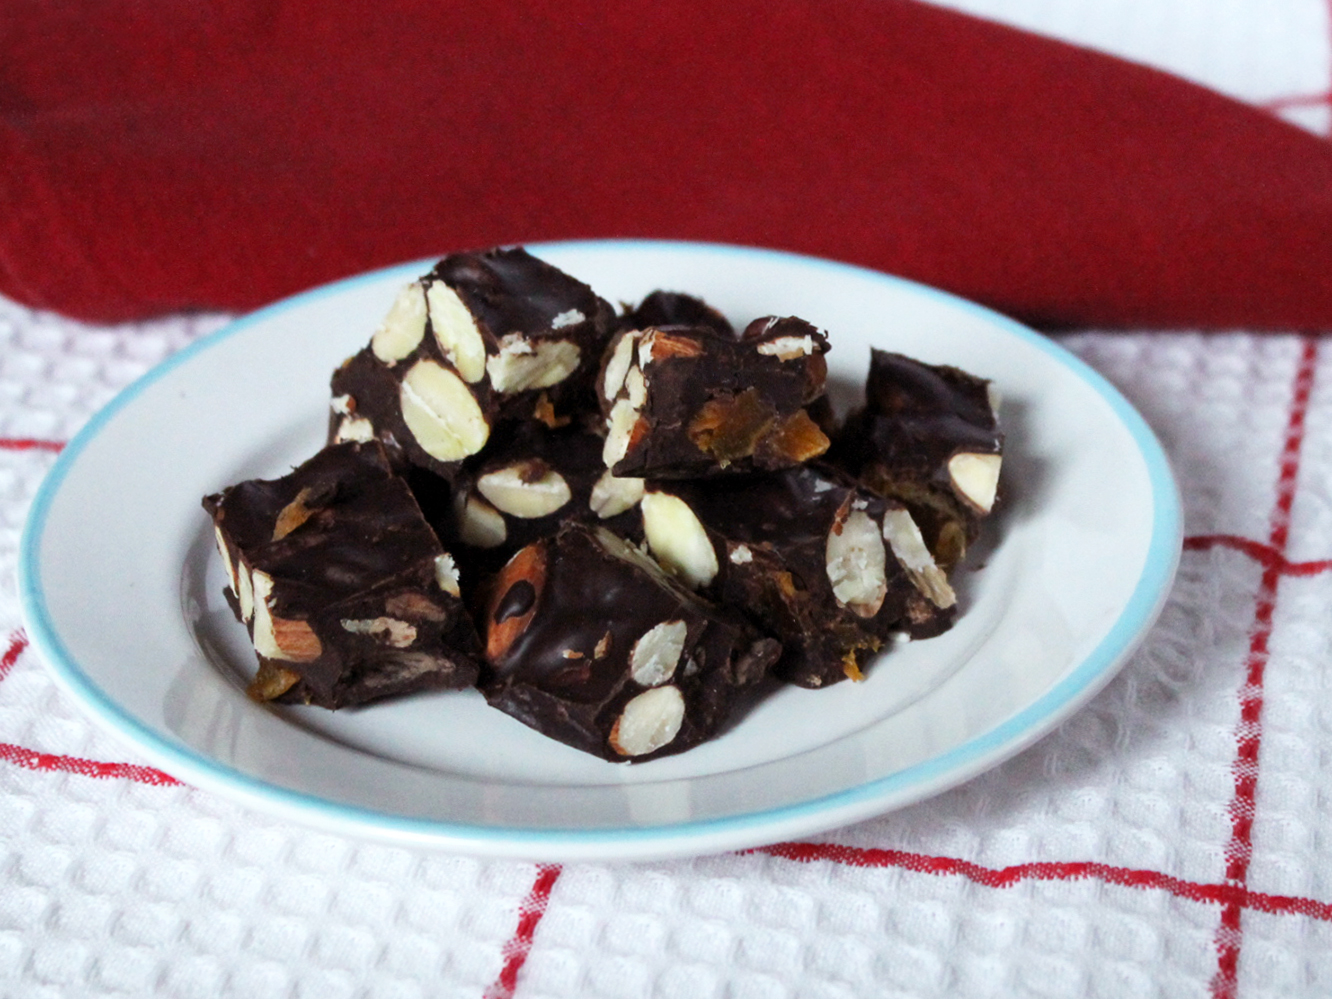
Recipe : Nick’s Fruit and Nut Dark Chocolate Treat

Hello! With Valentine's Day this week and Easter coming up next month, Chocolate season is upon us. So, here's an easy recipe for a delicious chocolate concoction that is as healthy as it can be while still being called a treat.
This recipe has been developed by my husband Nick, who has a great interest in cooking nutritious food. He tested this until he got it just right. I was the lucky taste tester and can attest to the fact that it is very good. It's not very sweet, though, so, if you find it not to your preference, play around with the kinds of chocolate you use. It's best made with bars of chocolate intended for baking but chocolate chips will work in a pinch.
There are photographs of the process following the written recipe.
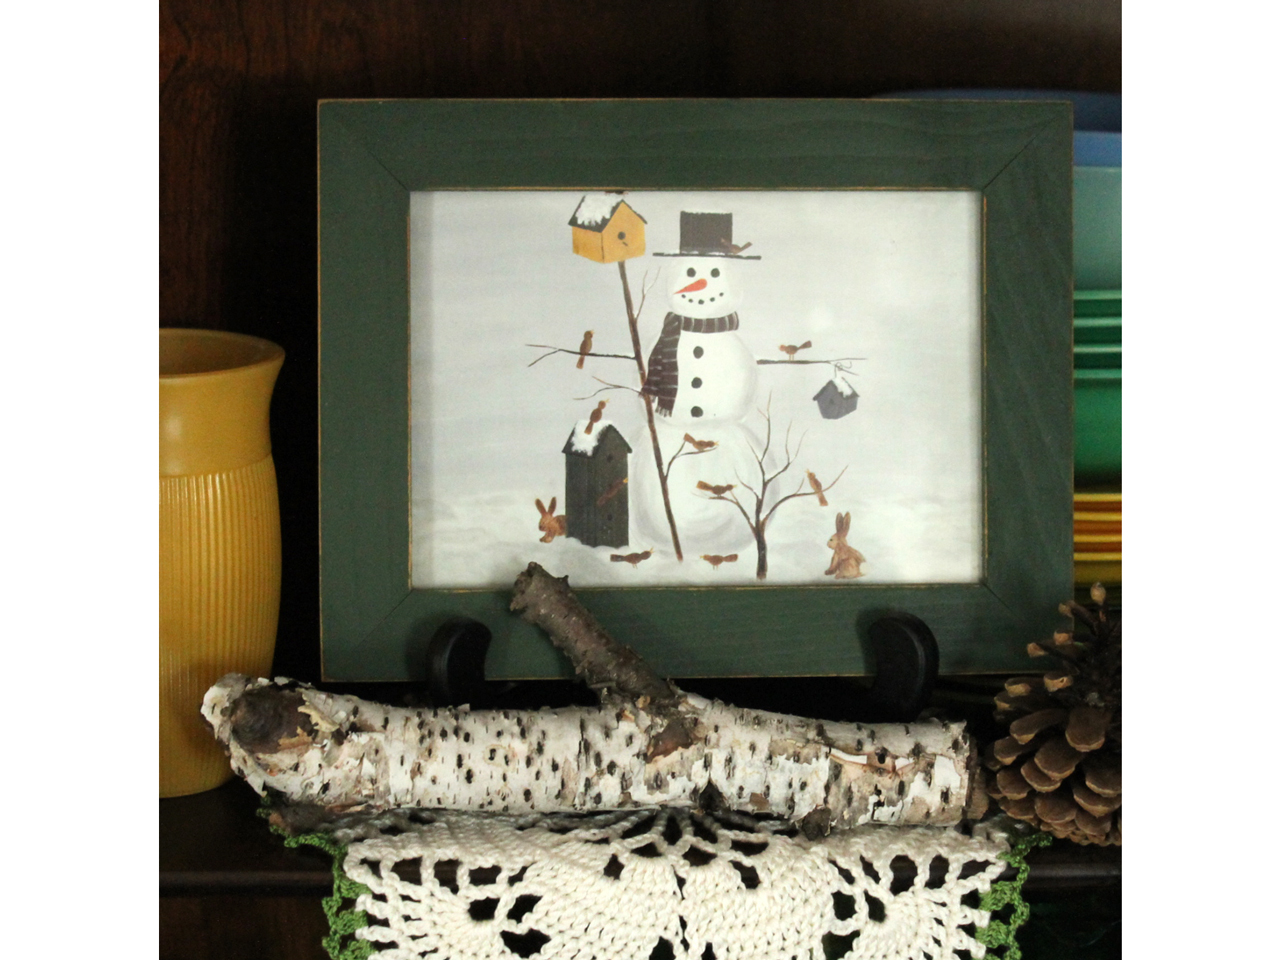
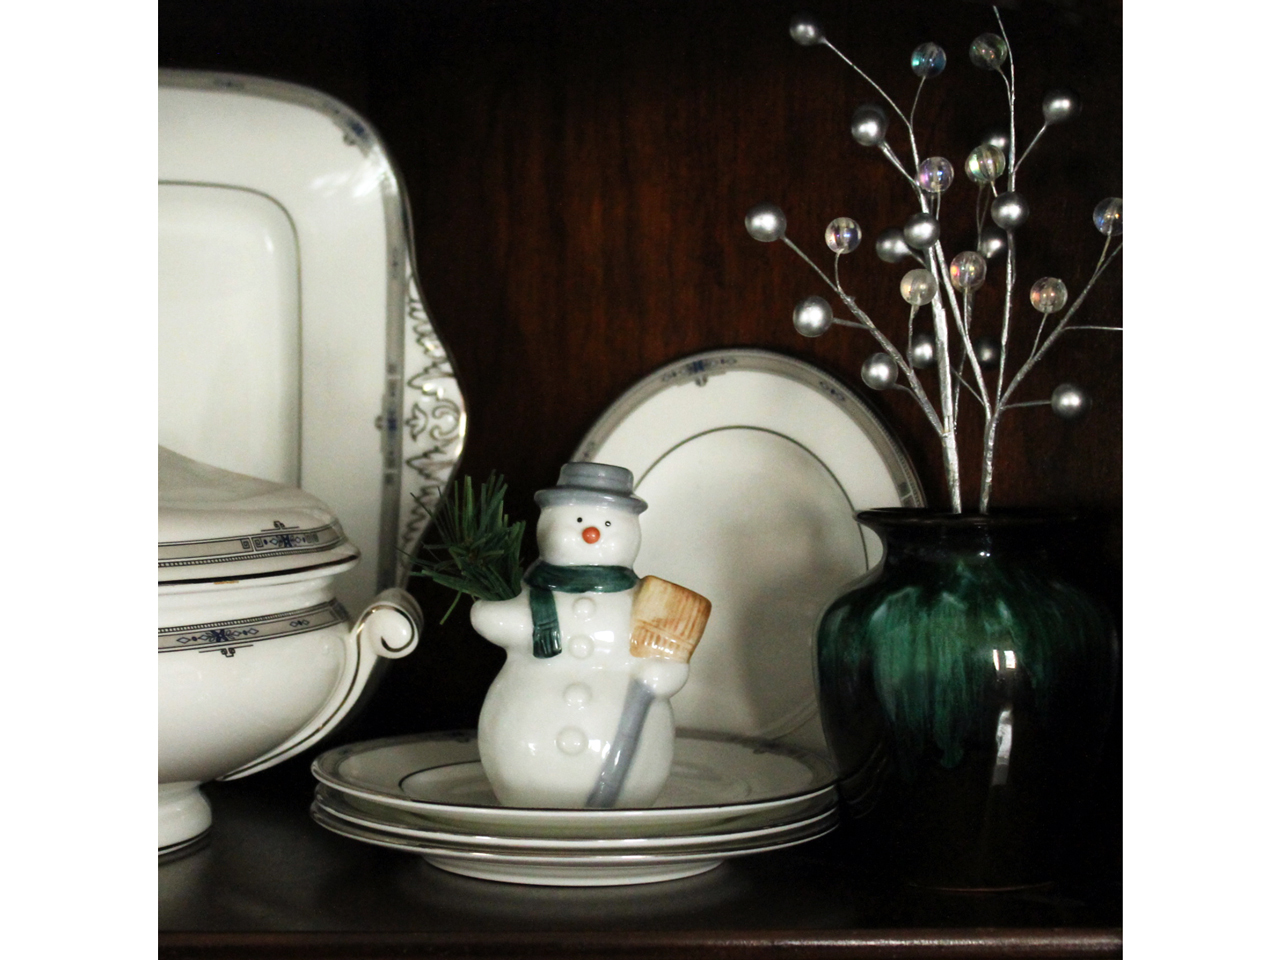
Frosty Winter Decorating
Greetings! I hope 2024 is off to a good start for you.
I've realized that since I began using Instagram last January, I've been posting a lot of the decorating photographs, which I used to post here on the blog, over there. But I know not everyone is on Instagram, so I'm going to begin to also share some of the images here, where there's more room to chat a bit more about the items in the displays.
So, here are recent photos of a few spots in our home decorated for winter. Long time readers will know that I love thrifting, therefore a whole lot of the items in these shots are from the thrift store. Nothing else gives me the thrill of a great thrift store find!
We'll begin with the snowmen! Something that the vintage/collecting community does on Instagram is give people a theme to consider when setting up their items to be photographed, and I've enjoyed playing along with many of them. For "Snowman Sunday" participants were asked to include a snowman somewhere in their shots. This has been going on for the months of December and January, so with three weeks of January already passed, here are my three contributions.
Vintage Barbie Dolls Get Decked Out for Christmas
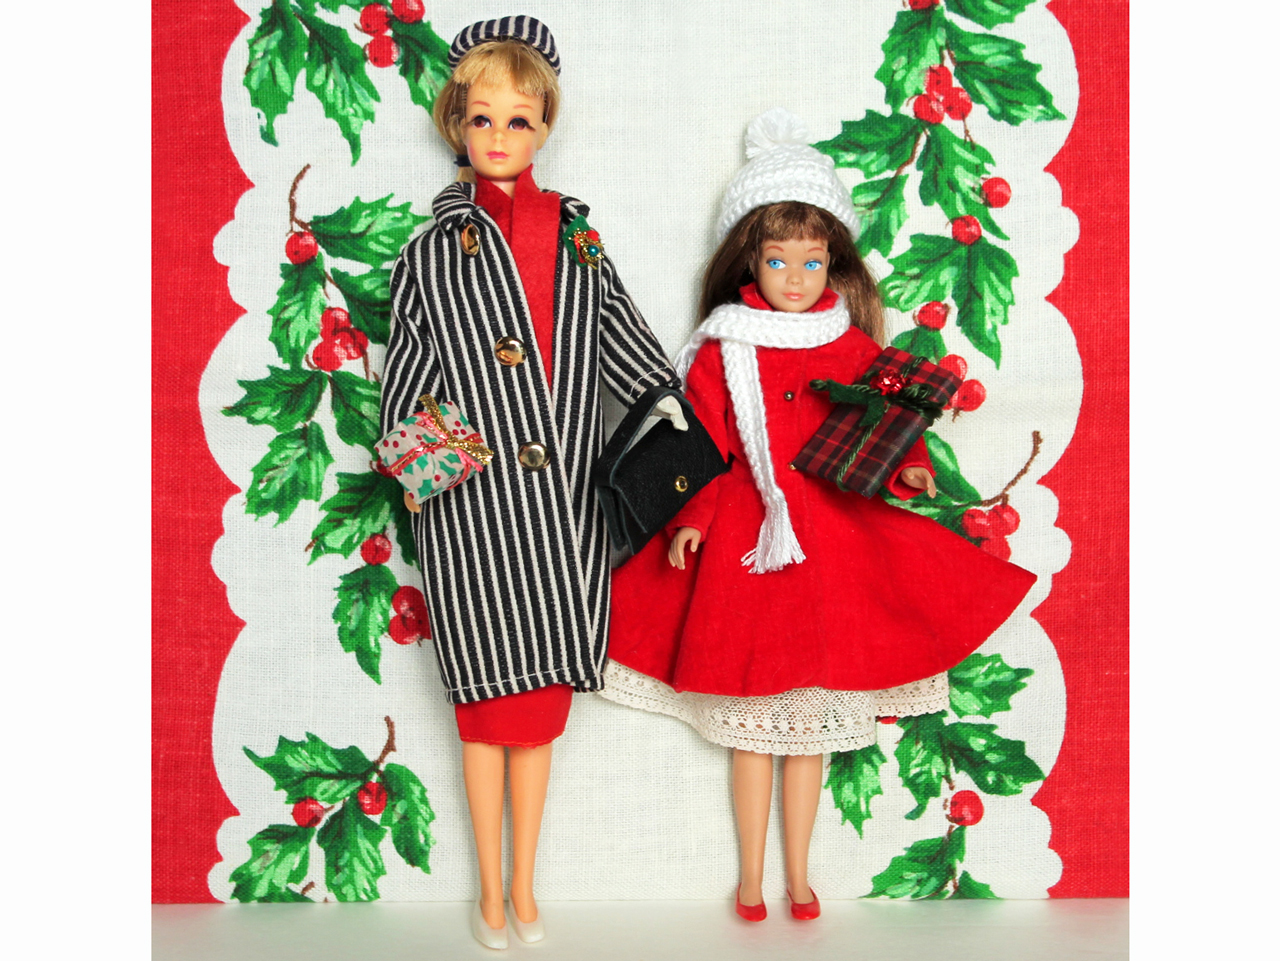
Hi! Earlier this year, a kind online friend sent me a generous gift of some vintage Barbie dolls and clothing for them. One of the dolls was the Skipper (Barbie's little sister, from 1963) in these photos. Also, years ago, an old friend gave me the gift of the other doll, Francie (Barbie's modern cousin, from 1965) and some amazing outfits for her. So, these two pals of mine started me down the vintage Barbie trail!
I've since discovered a whole world of vintage Barbie on Instagram, where collectors set up elaborate and wonderful scenes with their dolls, dressed to the nines in pristine vintage clothing and accessories.
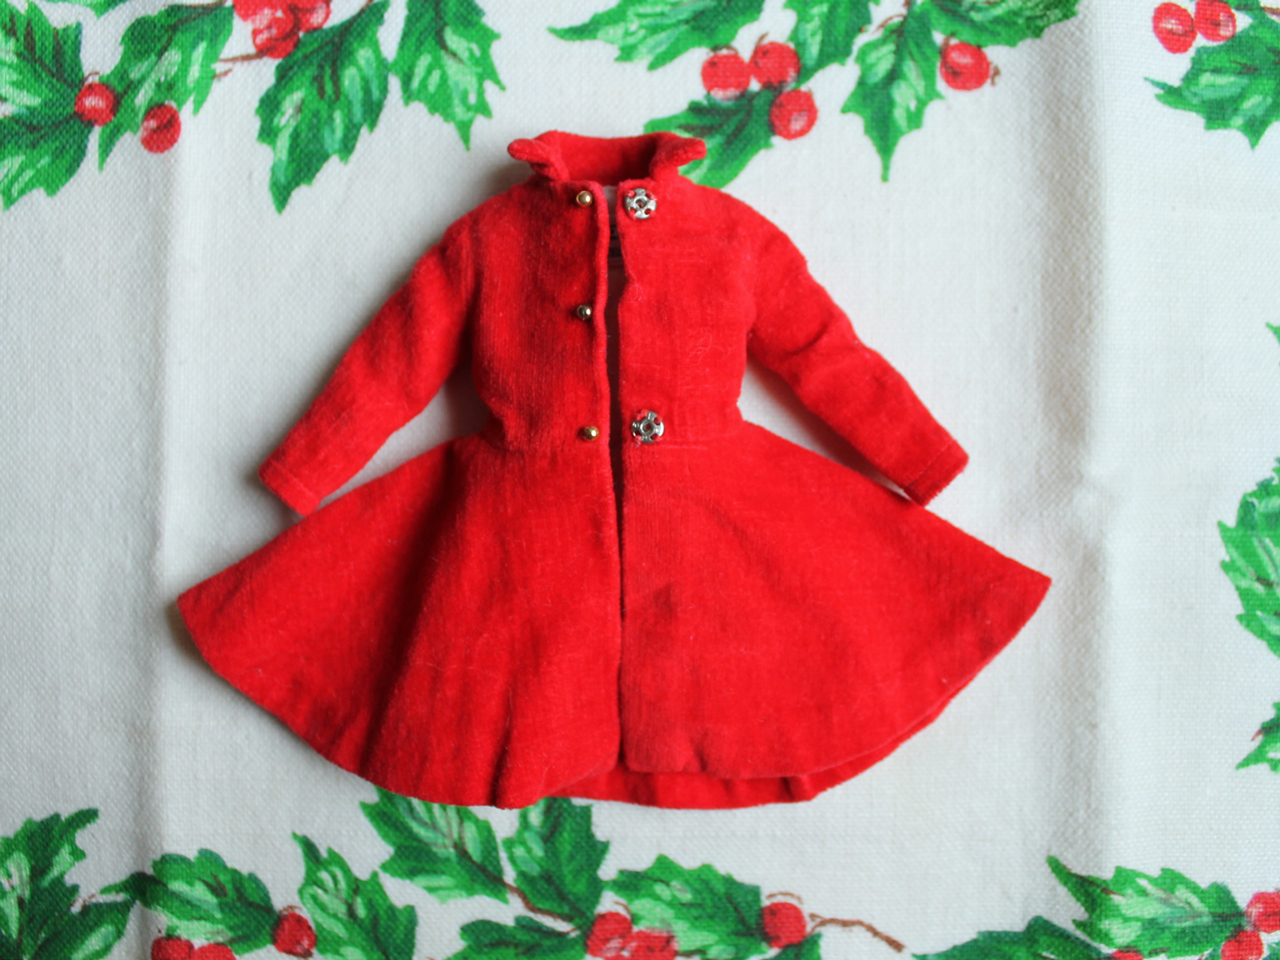
So, for a few months now, I've been spending time on ebay admiring the beautiful (and quite expensive) old dolls and clothing. One item I kept my eye out for was this red velvet coat for Skipper. The coat originally came with a hat, purse, gloves, socks and shoes, but all I "needed" was the coat. I eventually found it for $15 Cdn, including shipping, which might seem like a lot to pay for something like that, but, trust me, I'm a frugal shopper and that was a very good price for the tiny garment made in 1963, which still included all of it's original buttons and snaps. So, while I didn't spend a dime on clothing for myself to wear over the holidays, Skipper got a new/old coat!
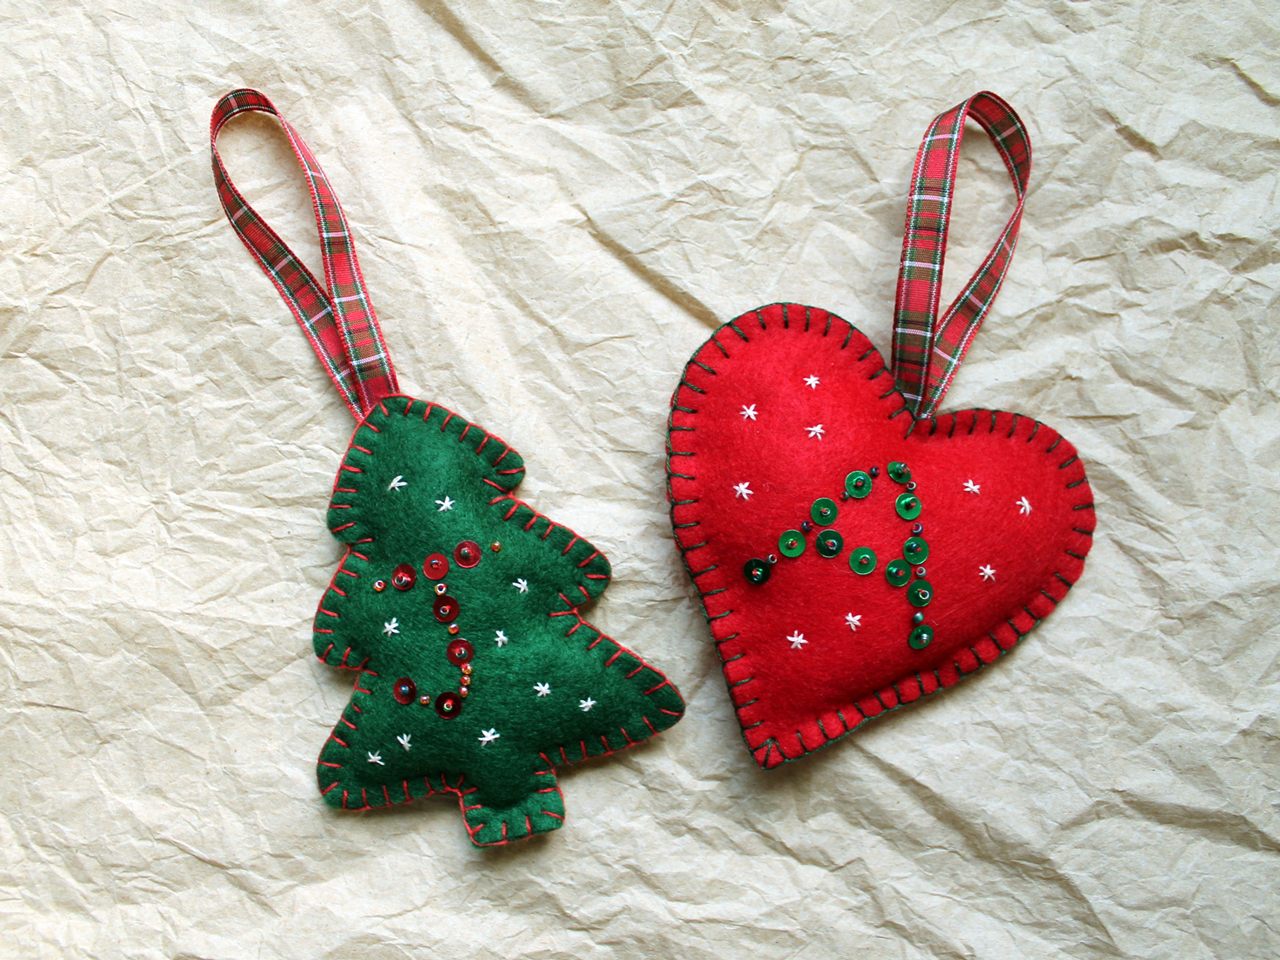
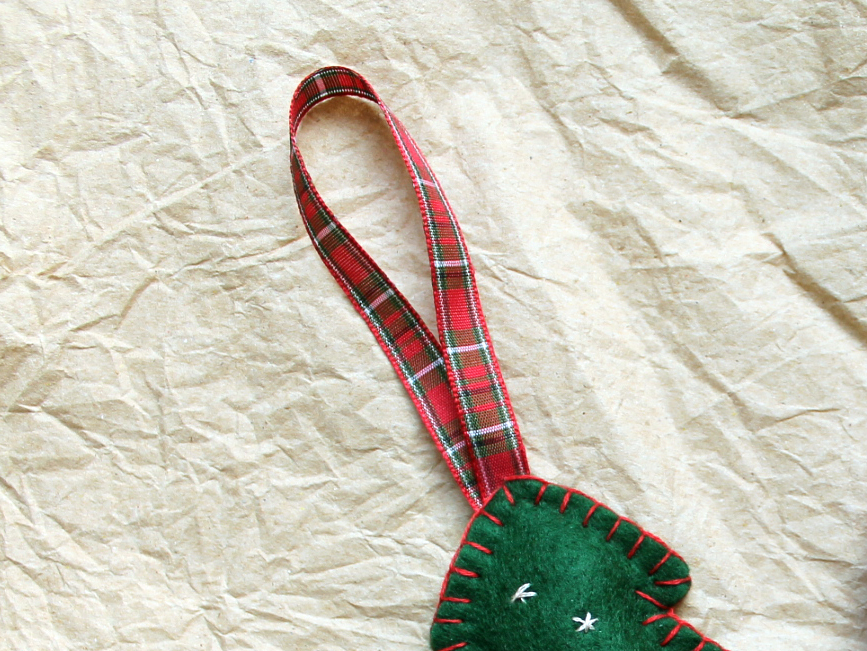
How to Make Customized Felt Christmas Ornaments
Hello, hello! I hope you're doing well.
I made these customized Christmas ornaments for some children in my life. They had to be unbreakable because they were going in the mail, and also because the kids are only two and four years old.
When I showed the finished pieces to my husband Nick, he immediately said "You did not just make those!" He was impressed by how nice they looked. And, since such a reaction came from something that was fairly easy to make, I thought I'd tell you how I did it. Sorry, I didn't take photos as I went along, but I think you'll get the idea.
These are similar to some Valentine Decorations I made years ago (which I still use in February every year). The tutorial for those is in this post.
Supplies:
- Felt - The higher the quality, the better. Pure wool felt would be excellent but I didn't have any. I used the kind you can buy by the sheet at fabric stores or places like Michael's. It’s a bit thicker than that found in packets at the dollar store. But, if you only have thin felt, you could try doing this with two layers per side.
- A Pattern - The shape and size of the ornaments is up to you. As you see, I did a heart and a tree, but you can keep it simple by making a square, diamond, circle, triangle (which, if elongated would look like a tree), or a random shape. I think a square turned 45 degrees so the point is at the top, would work very nicely, too.
- Straight pins
- Sequins and seed beads and a sewing needle that is thin enough to go through the hole of the beads (I mention that because mine wouldn't go through all the beads so I had to pick through them to find ones that worked.)
- Embroidery thread and regular sewing thread
- Thin Ribbon - a length of about 6 inches long
- Small amount of stuffing
How to Make One :
Draw the pattern on paper. To make something like a heart, fold the paper in half and draw half a heart, with the fold running vertically down the middle. That will ensure that both sides of the heart are the same, because when you cut it and then unfold, one half will be the mirror-image of the other. If that's confusing, there's a photo of what I'm trying to say in this post . That would also work for a tree. A circle can be made by tracing around something round.
Pin the paper pattern to the felt and cut around it. Repeat so you have 2.
Begin decorating one piece of felt with the initial. Either sketch out the letter with chalk or go freehand (I freehanded it). Using regular sewing thread, start with a sequin and bead combination, by sewing through the sequin, then through the bead, then back down through the sequin and felt. (There's a photo of what I mean in this post.) Use as many as needed to shape out the letter. Then go back and sew on beads by themselves, to help to better define the letter. Use a continuous length of sewing thread for both the sequins part and the bead part, randomly knotting between them, so they can't be pulled out of place from the right side. Finish with a knot and cut the thread.
For the little star or snowflake decorations, use 2 threads from a strand of embroidery floss (each strand will have 6 threads in it), stitch a small dash, then two more overtop, making a star-like pattern. Without cutting the thread, randomly move to another spot and do it again. Add as many as you'd like. Knot and cut the thread.
Stitch the two sides together using 2 threads of embroidery floss, either with a regular running stitch, overstitch (how to in this YouTube), or blanket stitch (how to in this YouTube). I went with the blanket stitch.
Start by attaching the ribbon hanger at the top. In order for your ornament to hang facing frontwards (and not sideways), fold the ribbon so that the front side of it overlaps where it is attached. Please look at the photo below to see what I mean. So, don't just fold the ribbon in half -- rather twist it so the right side of the ribbon on both ends is facing up when you attach it.


