Popular

Vegetarian Party Food : Three Quick Crostini Toppings

Christmas! (Swipe and Click)

    A Family Tradition : Making “The Mix” - Homemade Nuts and Bolts Snack
    Vintage Paper Part I : Christmas Cards

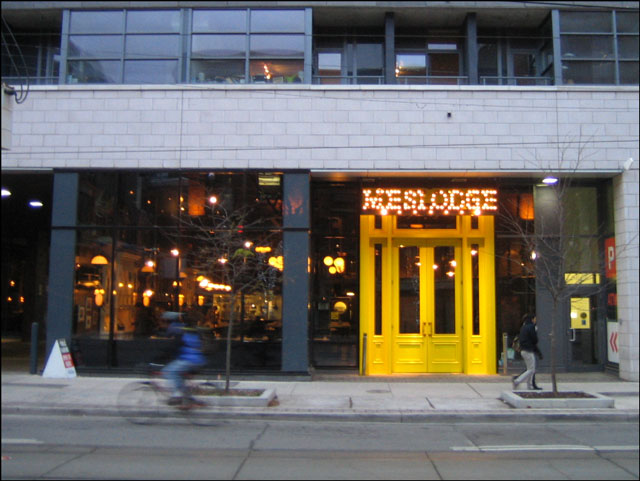
    Not so Mellow Yellow

    It's the last week for the photo series called 'Take Tuesday', that was organized by Shakti Dove. The final prompt is Yellow.

    I found participating in the series to be really fun and will miss taking photos to suit a theme every week. Here's sending a big thank you out to Shakti for pulling it together.

    These are my pictures, all of which were taken out and about on the streets of the city ...

    big yellow door


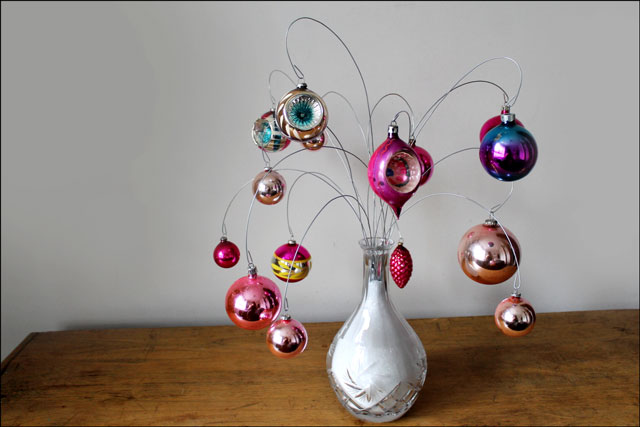
    Bouquet of Baubles : Making an Ornament Display with Wire, Salt and a Vase

    diy ornament display using
    c="http://www.loulou.to/wp-content/uploads/2012/12/diy-ornament-display-using-.jpg" alt="diy ornament display using wire and salt" width="640" height="427" class="aligncenter size-full wp-image-13670">
    This is an idea that has been running through my head for a while. You know, the type that you figure out every detail as you're falling asleep at night. I will cut some of that heavy wire we have in the garage, bend it with my hands and make a loop at the end with some pliers, anchor it in that vase I found with ... um, what? ... salt ... salt will work well, and will look sort of like snow. I'll use Epsom Salts so that they can be used after so nothing is wasted.And most times those ideas don't turn out exactly as you had imagined they would, no matter how many times you go through the steps in your head. Sometimes they turn out better.My mind's eye had pictured a more formal upright display, but I had not accounted for the springiness that the wire would afford. As I hung the ornaments on the 'stems', the weight of them pulled the wire down, creating a more random and organic looking effect.Aside: I know I have already shown a different way to display ornaments recently, (with this wall hanging), however I have quite a collection of them that I wanted to take out this year, after having most of them packed away for the past few years. The reason we have this many is that I lucked into a couple of fairly large lots of vintage ornaments a long time ago on ebay. I was fortunate to be amongst the first buyers using ebay, after Nick set us up to buy something he needed. At the beginning of the whole on-line auction thing, there were more sellers than there were people who were trusting enough to buy things on-line. This is all to say that back then, people were clearing out their attics quickly and selling amazing vintage things for very inexpensive prices. For fun (and not because I need any more!) I took a look at the vintage ornaments on sale on the site this year, and was quite amazed at the prices now. However, any lightweight ornaments, new or old, can be used on these.Anyway, back to making this ornament display ...

    Making Gift Wrap and Cards with Photographs

    diys using photographs


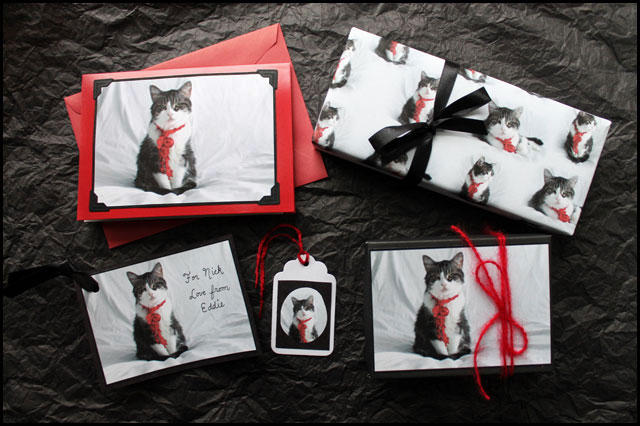
    Hello.  Yesterday I posted some photographs of my cat Eddie (here).  And with this post I will show you some things I made using the photographs. I have used pictures of my pet, however you can use any picture that you've taken. Also, as I am writing this at Christmas time, there is a holiday bend to what I have done, but these ideas can be used for any occasion.

    I used Photoshop to edit my pictures, however having used the excellent on-line (and free) services of Picmonkey.com, you could also use that program to make these things. I just used my home ink-jet colour printer and regular white paper to print up the images.

    I showed the method to make these greeting cards last year (here). In a nutshell, I made a fairly wide black border around the picture and then printed up two photos per page. Then I carefully cut them out. I chose pre-made card bases that came with envelopes but you can make your own bases too. The photographs are actually stuck to the card with two sided tape and then the photo-corners are added. So, the photo-corners are only for looks ... they don't actually attach the picture to the card. I finished the inside nicely by attaching a plain quality paper inside with a line of glue-stick. But, since I am prone to making mistakes when I write in cards, I wrote my message on that paper before attaching it to the card.

    Eddie’s Christmas Portrait

    eddie christmas cat 09


    Before you start thinking that I am an obsessive cat-person, let me say that this photo shoot was unplanned and impromptu, with the whole thing taking no more than five minutes from inception to completion. Ed was already laying on the bed, and the white sheet was right there in the clean laundry basket, so I just draped it up over the bed posts.

    Then I went to my sewing basket and untangled this piece of elastic sequins trim, from a ball of loose threads and lengths of wool (Does that happen in your sewing basket too? If not, what is your secret to keeping things tidy in there?). The short piece of ribbon was grabbed from my mess of a temporary gift-wrapping station, and the vintage bauble was gleaned from a box of ornaments. I just tied them together and slipped them loosely over Cat's head.

    Suddenly it was as if he knew exactly what was expected of him. He gave me several poses to chose from, moving from one to the next as though he were an experienced super model. Then, once I had enough and said 'Good Eddie', he laid down for a long winter's nap with the decoration still around his neck (which I took off right away, for his comfort and safely, although if I hadn't he would have had it off in a flash himself. I know this from experience, hence his collar-free existence.)

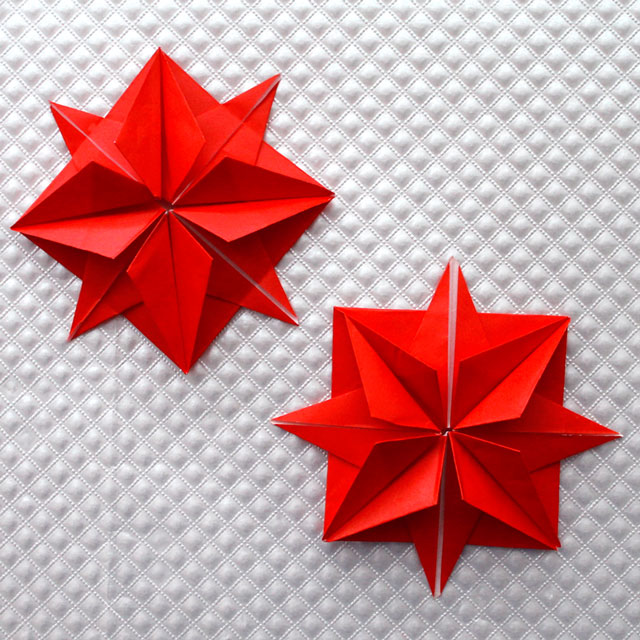
    Making Origami Stars

    8 point origami stars gift decorations
    I finally got our packages for the small people we love into the mail late yesterday. Since they were going to be packed in boxes and therefore any regular bows and ribbons would be crushed before the gifts made it under the tree, this year I wanted to try making some decorations that could be flattened and would still look pretty.Using this tutorial for an 8 Pointed Star, I made these. This was my first attempt at origami and while I did find this project to be a bit of a challenge, I was able to make them. So what I am saying is that they are easy enough for a beginner.I happened to have a package of coloured paper specifically intended for origami, (that I got years ago to use for something else), but you can do this with any paper. You start with a square that is 15cm x 15cm and your finished star will be 7.5cm, so whatever sized square you begin with, your star will be half the size.Since I was planning to use mine to embellish Christmas gifts, I chose to use red paper, with the finished stars reminding me of poinsettias, and white paper, resulting in something that looked like a snowflake.